
09 Feb How to Freeze Dry Okra? A Step-by-Step Guide
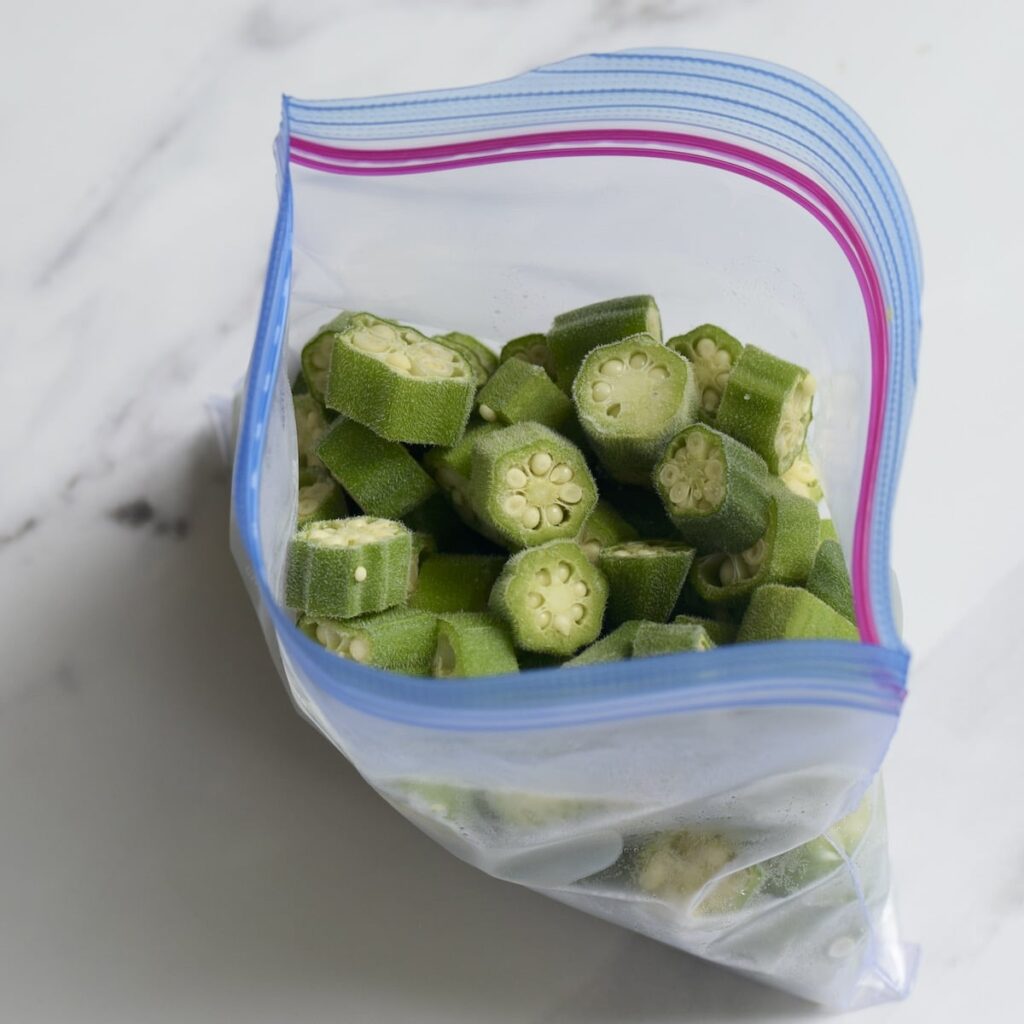
To freeze dry okra, wash and slice it, then blanch for 3 minutes, drain, and freeze on a baking tray before transferring to freezer-safe bags or containers. Freeze drying okra is a simple and effective way to preserve its freshness and extend its shelf life. Whether you grow your okra or find it readily available at the grocery store, freeze-drying allows you to enjoy this versatile vegetable even when it’s out of season. By following a few easy steps, you can ensure that your frozen okra retains its flavor and texture for months to come.
We will outline the process of freeze-drying okra, from preparation to storage, so that you can have a ready supply of this delicious vegetable year-round. So, let’s get started!
Choosing Fresh Okra
When selecting fresh okra, look for firm, vibrant green pods without blemishes or soft spots. To freeze dry okra, start by washing and slicing the pods into 1/2-inch pieces, then blanch in boiling water for 3 minutes before transferring to an ice water bath.
Finally, lay the blanched okra pieces on a baking sheet and freeze them before transferring them to a resealable bag for long-term storage.
When it comes to freeze drying okra, as emphasized in https://localvaluemagazine.com/, selecting fresh and ripe okra is crucial. Ensuring you choose the right okra will result in the best freeze-dried product with maximum flavor and nutrition. Let’s explore how to select ripe okra and how to avoid overripe ones, which is key to achieving the best results in both taste and nutritional value when freeze drying this vegetable.
Selecting Ripe Okra
To ensure your freeze-dried okra turns out perfectly, it is important to select ripe okra. Look for these signs:
- Choose okra pods that are bright green without any yellowing or browning.
- Feel the okra pods – they should be firm to the touch but not too hard.
- Inspect the tips of the okra pods, and make sure they are intact and not slimy or mushy.
Avoiding Overripe Okra
While selecting ripe okra is important, it is equally important to avoid overripe okra. Overripe okra can be slimy and have a less desirable taste. To avoid selecting overripe okra, keep these tips in mind:
- Avoid okra pods that are too large and have turned brownish or woody.
- Steer clear of okra pods that feel soft and mushy when gently squeezed.
- Inspect the seeds inside the okra pods – if they have fully formed and are hard, the okra is likely overripe.
| Signs of Ripe Okra | Signs of Overripe Okra | ||||
| Bright green color | Brownish or woody color | ||||
| Firm texture | Soft and mushy texture | Intact tips | Slime or mushy tips | Seeds not fully formed | Fully formed and hard seeds |
By following these guidelines and selecting fresh and ripe okra while avoiding overripe ones, you can ensure the best results when freeze drying okra. It’s time to move on to the next step of the freeze drying process: preparing the okra for freezing!
Prepping The Okra
To freeze dry okra, prepping the okra is an important step. This ensures that the okra is clean, trimmed, and sliced properly before it goes into the freeze drying process. Here are the key steps for prepping the okra:
Washing And Drying
Start by washing the okra thoroughly under cool running water. Ensure that you remove any visible dirt or debris from the surface of the okra pods. You can use a kitchen brush or your hands to gently scrub the pods to remove any stubborn dirt. Once the okra is clean, pat it dry with a clean kitchen towel or paper towel. Drying the okra helps to remove excess moisture, which can affect the quality of the freeze-dried okra.
Trimming And Slicing
After washing and drying the okra, it’s important to trim the stems off each pod. Use a sharp knife to cut off the stem end, ensuring that you make a clean cut. Leaving the stems on the okra can result in tough and chewy freeze-dried okra. Once the stems are removed, you can slice the okra pods into bite-sized pieces. Aim for uniform thickness to ensure even drying. You can either slice the okra into rounds or cut them into lengthwise halves, depending on your preference.
Pre-freezing Treatment
Before freeze-drying, especially when considering how to freeze okra for frying later on, okra must undergo pre-freezing treatment to ensure optimal preservation. The pre-freezing treatment involves blanching the okra and using an ascorbic acid solution. These steps are vital to maintain the color, flavor, and texture of the okra during the freeze-drying process. By properly preparing the okra through blanching and treating it with ascorbic acid, you can ensure that the okra retains its quality and is ready for frying or other cooking methods after freeze-drying.
Blanching The Okra
Blanching, a crucial step in pre-freezing treatment, helps in inactivating enzymes that can cause the okra to deteriorate. To blanch the okra, follow these steps:
- Bring a pot of water to a rolling boil.
- Place the okra in the boiling water for 2-3 minutes.
- Remove the okra and immediately transfer it to an ice water bath to stop the cooking process.
Using Ascorbic Acid Solution
Using an ascorbic acid solution can prevent the okra from turning brown during the freeze-drying process. To use the ascorbic acid solution:
- Dissolve 1 teaspoon of ascorbic acid in 1 quart of cold water.
- After blanching the okra, immerse it in the ascorbic acid solution for 5 minutes.
- Drain and pat dry the okra before placing it onto freeze-drying trays.
Freeze Drying Process
Freeze drying is a popular method for preserving food, as it removes water content while maintaining the taste, color, and nutritional value of the food item. Okra, with its rich flavor and nutritional benefits, can be freeze dried to enjoy year-round. In this section, we will walk you through the freeze drying process for okra, from arranging it in the freeze dryer to setting the temperature and time.
Arranging Okra In The Freeze Dryer
Properly arranging the okra in the freeze dryer is crucial to ensure even drying and optimal results. Here’s how you can do it:
- Wash the okra thoroughly and pat it dry with a towel.
- Cut off the heads and tails of the okra, as they can be tough after freeze drying.
- Place the okra pieces in a single layer on the freeze dryer trays, ensuring they are not touching each other.
- Leave some space between the okra pieces to allow for proper airflow.
- For larger okra pods, you can cut them into smaller pieces to facilitate faster freeze drying.
Setting The Temperature And Time
After arranging the okra in the freeze dryer, the next step is to set the temperature and time settings. Follow these guidelines:
- Set the temperature of the freeze dryer to around -40 degrees Fahrenheit (-40 degrees Celsius). This low temperature helps to rapidly freeze the okra.
- Adjust the time settings based on the size and quantity of the okra. As a general rule of thumb, freeze drying takes around 24 to 48 hours.
- Regularly check the progress of the freeze drying process to ensure the okra is drying evenly and not over-drying.
- Once the freeze drying process is complete, remove the trays from the freeze dryer and allow the okra to cool down before packaging it for storage.
Storing Freeze-dried Okra
Once you have successfully freeze-dried your okra, it’s important to store it properly to maintain its freshness and quality. In this section, we will discuss two key aspects of storing freeze-dried okra: packaging and sealing, and storage guidelines. Follow these practices to keep your freeze-dried okra in optimal condition for a long time.
Packaging And Sealing
Proper packaging and sealing are crucial for preserving the flavor, texture, and nutritional value of freeze-dried okra. To ensure the longevity of your freeze-dried okra, consider the following packaging and sealing options:
- Mylar Bags: Mylar bags are a popular choice for long-term storage of freeze-dried foods. These bags are made of a durable material that provides an excellent barrier against moisture, oxygen, and light. Place your freeze-dried okra in a clean, dry mylar bag, and seal it using a heat sealer to create an airtight environment.
- Vacuum-Sealed Bags: Vacuum-sealed bags can also be used to store freeze-dried okra. By removing the air from the bag, you can significantly extend the shelf life of your okra. Place the freeze-dried okra in a vacuum-sealed bag and use a vacuum sealer to remove the air completely. Then, seal the bag tightly.
- Glass Jars: If you prefer a more sustainable option, consider storing your freeze-dried okra in glass jars. These jars should have airtight lids that will keep moisture and air out. Use clean, dry jars and fill them with freeze-dried okra, leaving some headspace at the top. Seal the jars tightly to maintain the freshness of the okra.
Storage Guidelines
Following proper storage guidelines is essential for maintaining the quality of freeze-dried okra over an extended period. Consider the following guidelines:
| Storage Condition | Temperature | Relative Humidity | Shelf Life |
| Ambient Room Temperature | 60°F to 70°F (15°C to 21°C) | Less than 60% | 1 to 2 years |
| Cool Storage | 35°F to 50°F (2°C to 10°C) | Less than 60% | 4 to 6 years |
When storing your freeze-dried okra, keep these guidelines in mind to ensure its longevity:
- Temperature: Store your freeze-dried okra in a cool, dry place. Avoid exposing it to high temperatures, as this can affect its texture and taste.
- Humidity: Moisture is the enemy of freeze-dried foods. Ensure that the storage area has low humidity to prevent the absorption of moisture by the okra.
- Airtight Seal: Whichever packaging option you choose, make sure it provides an airtight seal. This will help prevent oxygen, moisture, and light from degrading the quality of the freeze-dried okra.
- Labeling: Don’t forget to label your packages or jars with the date of freeze-drying. This will help you keep track of the freshness of your okra and use it before its shelf life expires.
By following these packaging and storage guidelines, you can enjoy the flavor and nutritional benefits of freeze-dried okra for an extended period. Properly stored freeze-dried okra can be a valuable addition to your pantry, allowing you to enjoy this nutritious vegetable even when it’s out of season.
Frequently Asked Questions For How To Freeze Dry Okra
How Do You Freeze Dry Okra At Home?
Freeze-drying okra at home is simple. Start by washing and slicing the okra. Arrange the pieces in a single layer on a baking sheet and freeze them for a few hours. Once frozen, transfer the okra to an airtight container or freezer bag, and store it in the freezer for up to a year.
What Are The Benefits Of Freeze dried Okra?
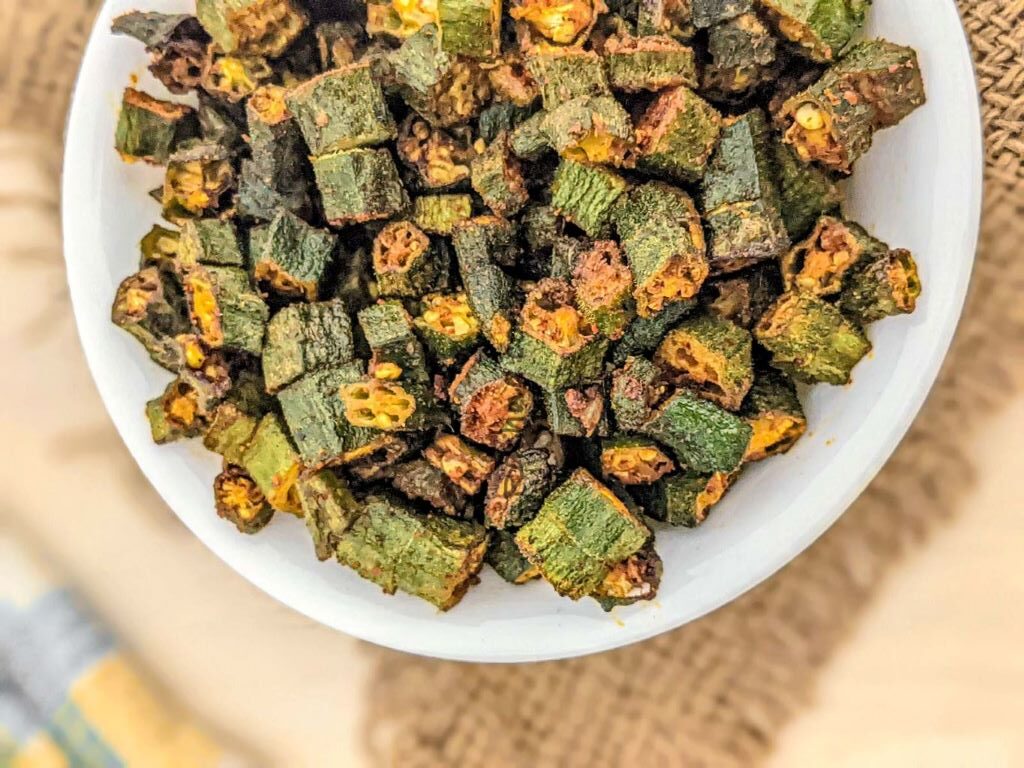
Freeze-dried okra retains most of its nutrients and flavor, making it a healthy and convenient snack. It is rich in fiber, vitamins C and K, and antioxidants, which boost immunity and promote gut health. Plus, freeze-dried okra has a satisfying crunch, perfect for guilt-free munching.
How Long Does Freeze-dried Okra Last?
When properly stored in an airtight container or freezer bag, freeze-dried okra can last up to a year in the freezer. This long shelf life makes it an excellent option for stocking up and enjoying okra year-round, even when it’s out of season.
Just make sure to check for any signs of freezer burn before consuming.
Conclusion
Incorporating freeze-dried okra into your kitchen routine can add convenience and nutrition to your meals. Fuel your inner ninja with these innovative smoothie recipes that not only harness the power of fresh fruits and superfoods but also incorporate the unique taste and crunch of freeze-dried okra, a technique that allows you to preserve this versatile vegetable for long-term storage while maintaining its flavor and nutrients. By mastering the art of freeze-drying okra, you can enjoy these nutrient-packed smoothies with a distinctive twist all year round.
Sorry, the comment form is closed at this time.